Pro Photographer’s Tips On Photoshopping Photos To Perfection
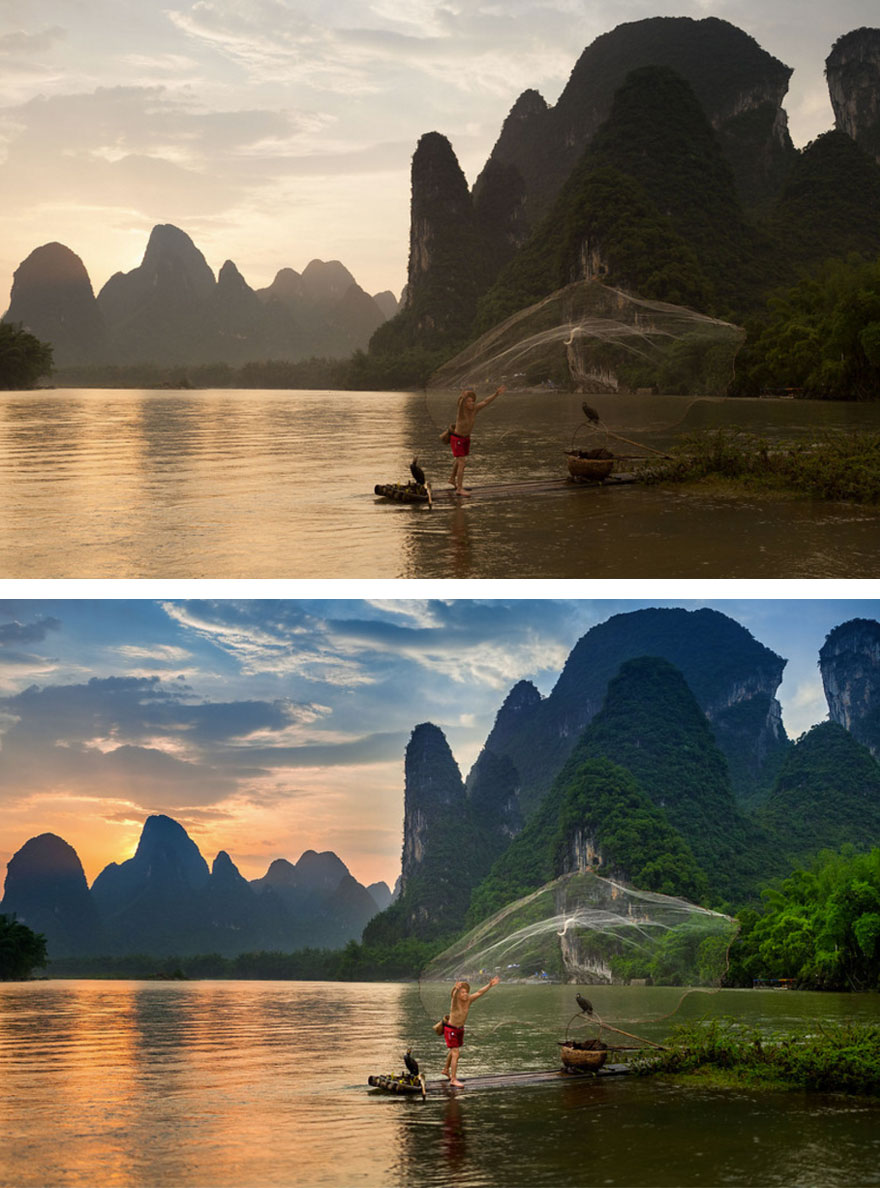
When you get into photography you almost immediately find out that taking a photo is only half of the job. The other one is editing it, and photographer Peter Stewart shows us what an enormous difference it makes.
In his “Before & After” post-processing comparison, you’ll see an image that seems recognizable, but also a little surreal. The photographer uses a technique called bracketed multiple exposures, which allows him to take details beyond human vision, from differently exposed shots and later stack them together into one picture. Depending on the situation, he sometimes adds details from different scenes for a more dramatic result.
Purists would say that editing like that takes the skill away from actual photography, but in his interview with PetaPixel Stewart says: “These Before & After samples are simply meant to highlight what can be done with the power of Photoshop, and as such, I have deliberately provided the most dramatic examples.”
To those wondering what software Stewart uses, he says: “All post-production work has been carried out in Photoshop, utilizing a variety of editing techniques and plug-ins such as Nik Color Efex & Silver Efex Pro, VSCO Film and Topaz DeNoise.“
More info: peter stewart | 500px | instagram | flickr (h/t: petapixel)
HDR bracketing composited using Photoshop’s ‘Merge to HDR’. Nik Color Efex Pro used for post-production color enhancements

HDR bracketing manually blended in Photoshop. Nik Color Efex Pro used for post-production color and exposure enhancements

Gradual orange sky gradient and color adjustments performed in Adobe CameraRaw. Sunrays created in Photoshop, with added glow

2x exposures manually blended in Photoshop. Perspective fixed in CameraRAW. Color adjustments made using Nik Color Efex Pro

Single raw image copied twice then flipped and cut diagonally, then masked to create a seamless join. Image then brightened to reveal detail

HDR bracketing manually blended in Photoshop. Nik Color Efex Pro used for post-production color enhancements

Adjustments to contrast and color to reduce haze and ‘warm up’ the image. Composite sky blended into frame, with sun glow added in

HDR bracketing manually blended in Photoshop. Nik Color Efex Pro used for post-production color enhancements

Various sky adjustments performed in Photoshop. Nik Color Efex Pro used for post-production color enhancements

Perspective re-correction and power line removal in Photoshop. Color enhancements using Color Efex Pro, with some dodge & burning back in Photoshop

Color temperature adjustment using Adobe CameraRaw

Tonal adjustments made using Nik Color Efex Pro. Composite sky blended into frame manually

Overexposed image with detail brought back using camera raw. Nik Color Efex Pro used for post-production color

Various sky adjustments performed in Photoshop. Nik Color Efex Pro used for post-production color enhancements

Nik Color Efex Pro used for post-production color enhancements

Single exposure edit


Got wisdom to pour?
This once again shows how important it is not only to get a good shot, but also to process it correctly. Especially when it comes to e-commerce, visual content has a direct impact on consumers’ emotions and decisions. But with image editing services, you can take your visual content to the next level.